SSO Configuration
This guide illustrates how to set up single sign-on with the echonovum HUB and Microsoft Azure as an Identity Provider.
Before you Start
Following prerequisites need to be met before you can start with the configuration:
Access to the echonovum Hub and the necessary permissions to configure SSO
Role
OwnerorITis required
Access to the Microsoft Azure Portal
A user in Azure that has the following roles assigned:
Application administrator
External Identity Provider administrator
Create an application on Microsoft Azure Active Directory
Login to Azure
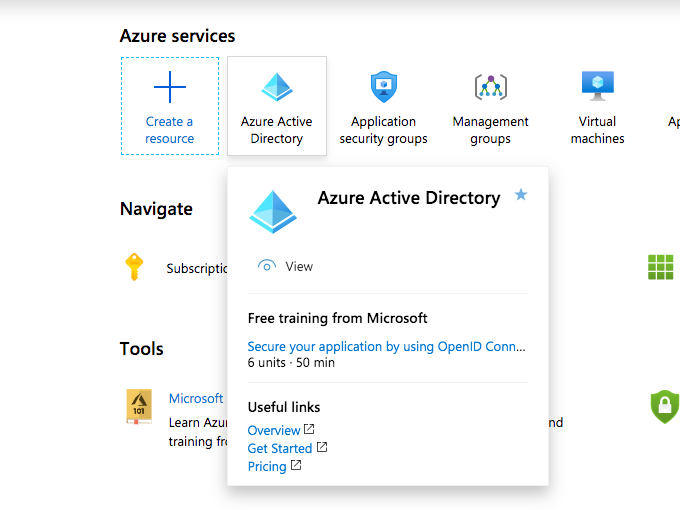
Select Azure Active Directory from the menu

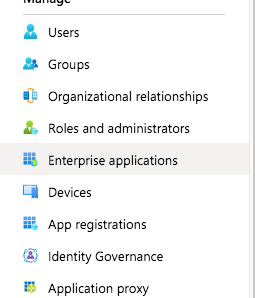
Navigate to Enterprise applications in the left hand menu

Click on + New application and select Non-gallery application
Give the application a name e.g. "echonovum" and press add
Add the Single Sign-On Configuration
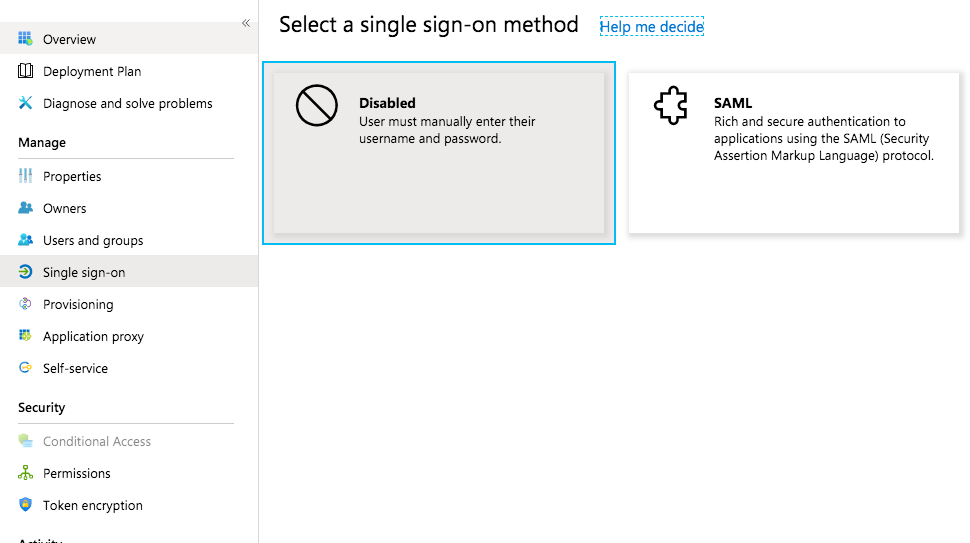
First click on Single sign-on on the left side menu and then on the SAML card.

Set up the Basic SAML Configuration

- Identifier (Entity ID)
The unique identifier of the service provider. This is the base URL of the HUB.
https://hub.echonovum.com- Reply URL (Assertion Consumer Service URL)
The URL where the SAML response is sent to. This is a specific URL on the HUB for your organization.
https://hub.echonovum.com/sso/saml/{orgUuid}/authenticate- Sign on URL
The URL where the user is redirected to when he logs in. This is a specific URL on the HUB.
https://hub.echonovum.com/sso/saml/login- Relay State
The URL where the user is redirected to after the SAML response is sent. This is optional and can be left empty.
- Logout Url
The URL where the user is redirected to when he logs out. This is a specific URL on the HUB.
`https://hub.echonovum.com/logout``
Configure SSO on the HUB
Login to the echonovum Hub
Navigate to the Single sign-on section
Click on Create SSO-Configuration
Fill out the form as described below
SSO Configuration Form
Section "General Settings"
- Email domain(s) considered for SSO
Enter the domain(s) that should be considered for SSO. E.g.
echonovum.com- Permissions to access following applications
Select the user has access to on first login.
Section "Basic SAML configuration for the IdP"
Map the following fields from Azure to echonovum:
Attribute echonovum | Field in Azure |
|---|---|
Identity Provider ID | Azure AD Identifier |
Single sign-on URL | Login Url |
Single sign-out URL | Logout Url |
IdP x509 Certificate | The X509Certificate from the App Federation Metadata |
How to get the X509Certificate from the App Federation Metadata
Copy the App Federation Metadata Url and open it in a new Tab
Find the Key
<ds:X509Certificate>within the<md:KeyDescriptor use="signing">node and copy its value. Make sure the entire certificate is copied.
Open the image in a new tab to see it in full
Head over to the Hub SSO configuration and paste the value in the IdP x509 Certificate field.
Section "User attribute matching"
We suggest to map the claims as follows in echonovum:
- ID attribute Name
The unique identifier of the user in Azure AD. This is used to match the user in echonovum.
http://schemas.microsoft.com/identity/claims/objectidentifier- Email attribute name
The email address of the user in Azure AD. This is used to match with the configured domains in the SSO configuration and is set as a username.
http://schemas.xmlsoap.org/ws/2005/05/identity/claims/emailaddress- First name attribute name
The first name of the user in Azure AD. This is used to set the first name of the user in echonovum.
http://schemas.xmlsoap.org/ws/2005/05/identity/claims/givenname- Surname attribute name
The surname of the user in Azure AD. This is used to set the surname of the user in echonovum.
http://schemas.xmlsoap.org/ws/2005/05/identity/claims/surname
Section "SP Encryption"
If you want to si the SAML assertions, make sure to turn on the SP Encryption.
Security
Encrypted SAML Assertions
To ensure adequate security we urge you to enforce the Identity provider to only send encrypted SAML requests.
For this to work you need to import and activate a certificate in the Token encryption section of your newly created enterprise application in Azure.
Download the certificate from the echonovum Hub
Go to the Token encryption section in the Azure Enterprise application
Press Import Certificate and upload the certificate you've just downloaded
Active the token encryption

Open the image in a new tab to see it in full
Test the integration
Test the Login with a username that does not have the role IT in your organization. Check out the log entries on the Single sign-on page on the HUB for the status off the SSO integration.